How To Cut A Lace Front Wig: Step by step
Lace front wigs are gaining popularity among those seeking a natural-looking and versatile hair solution. Trimming is a crucial step in achieving a flawless and personalized look with your lace front wig. While it may seem challenging, cutting a lace front wig is manageable with the right tools and techniques. This guide will walk you through the proper steps to trim a lace front wig effectively

Why Should You Cut the Lace Front Wig?
Cutting the lace allows you to shape the wig to match your natural hairline, creating a seamless and realistic transition between the wig and your own hair. This helps the wig appear more natural and less detectable.
Additionally, it offers more styling versatility. You can create a natural-looking hairline, part the hair in different directions, and even pull it back without revealing the edge of the wig.
How to Cut a Lace Front Wig
Before cutting your lace front wig, make sure you have the following tools ready:
- Large hair clips
- Rat-tail comb
- Scissors, eyebrow shaver, or razors
- Wig head (optional)
- Foaming mousse or water
- Makeup pencil
Step 1: Put the Wig On
- On your head: Position the wig so that the hairline sits approximately a quarter-inch above your natural hairline. Secure the wig using the attached clips and adjustable straps. Ensure the lace lies flat against your scalp for a smooth fit.
- On a wig head: Use T-pins to fasten the wig securely onto the wig head. This will keep it from moving while you work on it.

Step 2: Cut Off the Ear Tabs
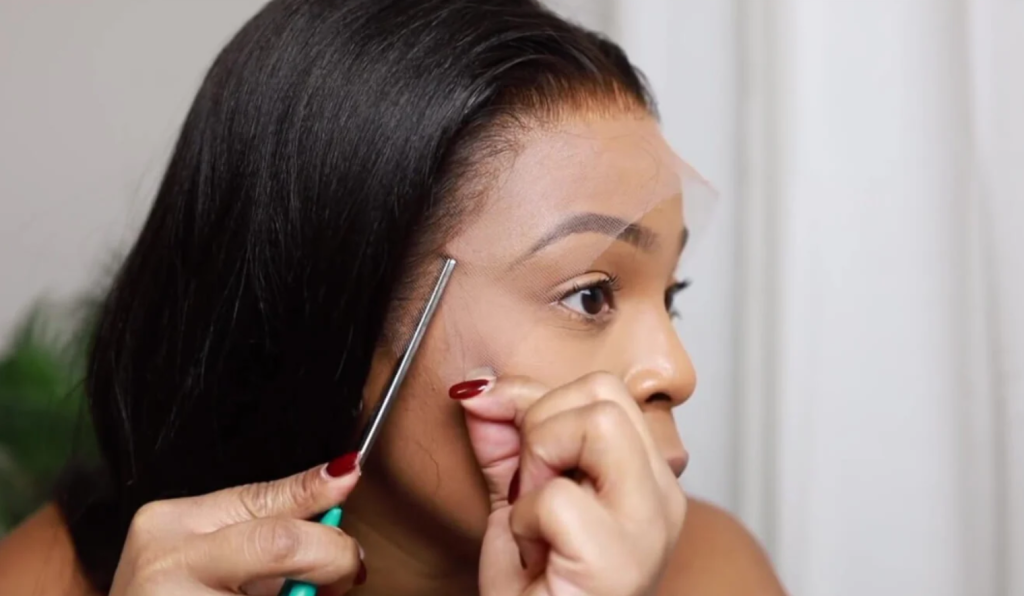
- Use the pointed end of a comb or a similar tool to part the hair just above your ear.
- Pin the hair up, leaving a small tab of the wig over your ear.
- With scissors, carefully cut around the shape of your ear, removing the excess tab. This will help the wig sit flat during the cutting process and ensure a smooth installation.
Step 3: Mark the Hairline
Marking the hairline can serve as a helpful guide to avoid cutting off too much lace, though some prefer to skip this step.
- Take a makeup pencil and trace your hairline from ear to ear. Draw a line on your skin in the shape of your natural hairline, leaving about a quarter-inch gap between the traced line and your actual hairline.
- If needed, comb the wig hair back and use clips to keep it out of the way. Apply a small amount of styling mousse or water to hold the hair in place.
- Using a wig head: Once the wig is properly secured on your head, draw a quarter-inch line on the lace in front of your natural hairline. This guide will be visible when you place the wig on the wig head for cutting, ensuring accuracy during the trimming process.

Step 4: Cut the Lace
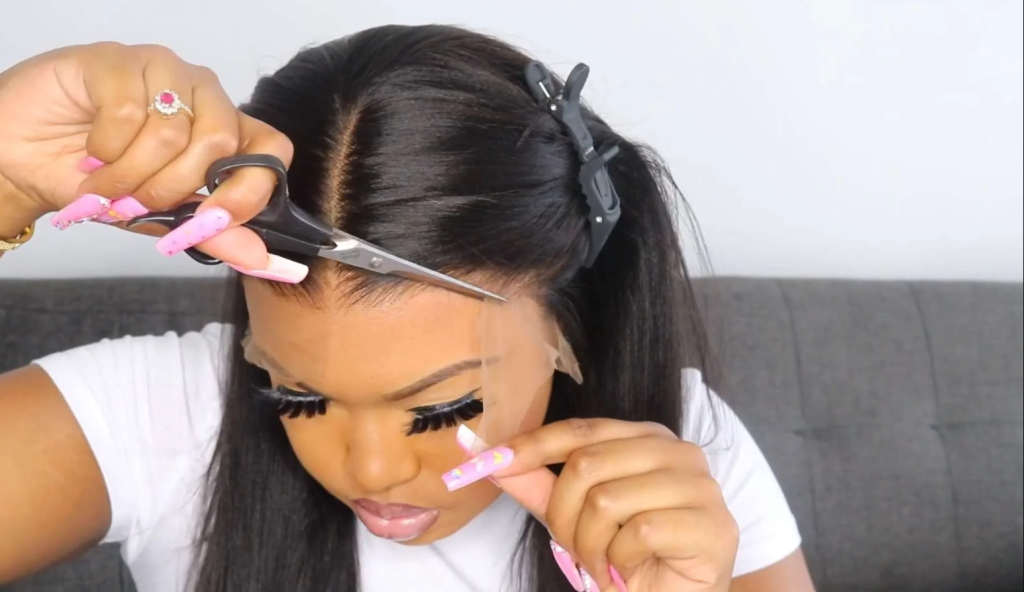
- Make small snips along the hairline where you’ve marked on the lace, dividing it into manageable sections. This helps avoid snags or jagged edges while cutting.
- Gently pull the lace taut and carefully cut along each section of the hairline, ensuring you don’t accidentally cut into the wig.
- Avoid cutting in perfectly straight lines, as they may look unnatural. Instead, aim for slightly irregular cuts to create a more realistic appearance.
- If you’re not comfortable cutting the lace in one go, that’s fine. You can cut it in smaller sections to make the process more manageable.
Tips for Cutting a Lace Front Wig
- To find the center of the wig’s lace front, place a thin hair clip vertically at the midpoint. This will help ensure the lace is evenly divided on both sides of the clip.
- Use two large hair clips to secure the hair on either side of the center-marking clip. This will prevent any stray hairs from being accidentally cut.
- When cutting the lace, use long, smooth scissor strokes to avoid creating sharp edges. It’s better to cut small pieces of lace gradually, as cutting too much at once can damage the wig.
- Once you’ve removed the center-marking clip, keep the wig hair clipped back, adjusting the clips as necessary.
- Cut the lace starting from the back and moving toward the front hairline. Trim it back to the hairline, making the lace on the forehead more noticeable. Use your fingers to hold the lace firmly for smooth, even cuts.
- Pay attention to trimming the sides of the wig, particularly the deep, less visible sections near the ears. The lace here should be trimmed all the way back since these areas are less noticeable than the forehead.
- After trimming, double-check for sharp edges. Ensure the lace is trimmed evenly, especially around the forehead, to achieve a polished look.

Things You Need to Remember
- Lace front wigs need to be trimmed carefully, but avoid cutting too close to the hairline, as this may cause the hair to shed. It is recommended to leave 1 to 2 inches of lace from the hairline when cutting.
- Cutting the lace front incorrectly can result in dry, brittle hair. The wig may start to look unnatural and lose its resemblance to real hair. It’s important to care for your wig just like your own hair to keep it in great condition.
- An improperly cut hairline won’t look natural. To avoid an unattractive look, it’s best to seek professional help if you’re unsure about cutting or applying the lace front wig.
- Many beginners use the wrong adhesive for their lace front wigs. Ensure that you use the correct adhesive, and give it enough time to dry completely. This process can take up to 15 minutes.
Conclusion
Cutting a lace front wig may seem intimidating at first, but with patience and attention to detail, you can achieve a customized, natural-looking style. By following these step-by-step instructions and taking your time, you’ll be able to confidently trim your lace front wig to suit your individual preferences and enhance your overall look.


